
In alphabetical order by category. Enjoy!
BEVERAGES
Feel-better Tea
Start with a bag or a ball of loose leaves of your favorite tea. (I prefer green tea for this drink.) Prepare the tea.
Add the juice of one lemon (about 1 Tablespoon). (If you don’t have real lemons in your vegetable crisper, get some before you succumb. They make almost everything taste better. You’ll use them up. You will.) Add 1-2 Tablespoons (yes, that much) honey. Stir and sip slowly while flipping through a good magazine, watching mindless TV or snuggling in a soft blanket with the dog by your side.
Remember to not give honey to infants. Feel better soon!
Mixed-Bag Sun Tea
Fill a large glass pitcher (like a half gallon or so) with room-temperature water. Filtered tastes better. Add seven bags of tea — four real tea (black or green) and three herbal tea (chai, berry, citrus, peppermint, etc. or throw in some herbs from the garden if you like.)
Rubber band a dish cloth over the top to keep the bugs out and set the whole thing in the sun. Whenever the tea looks the right color to you — brewing speed depends on how sunny and warm the day is — taste a sip. If it’s strong enough for your liking, remove the bags and refrigerate the pitcher. As this tea is more mellow than the kind brewed on the stove top and contains a flavorful mix, you probably will not need sugar.
Serve in tall glasses, with lots of ice, on a porch near you.
Simple Nada Sangria
Using a juicer or blender, puree small chunks of seedless watermelon and frozen orange juice concentrate in batches. We used about 1/4 can of OJ for half a watermelon. If you’re using a blender, you may need to start at “chop” or turn the blender off a few times to readjust the contents for easier blending.
That’s it! Sit on the porch and enjoy. And, if there’s anything left, freeze it in molds or ice cube trays for later.
Vegan Hot Chocolate for Two
Heat together 1 1/2 cups full-fat coconut milk and 2 teaspoons sugar on medium heat, stirring frequently. Turn off the burner just as tiny bubbles form, but before the mixture comes to a boil.
Add 8 ounces of very dark chocolate (check label to make sure there’s no dairy). If it’s in chip form, just pour them in and stir to melt, reheating a bit if needed. If it’s in bar form, chop the chocolate into coarse bits before adding it to the nut milk mixture.
Serve in two mugs, topped with a vegan marshmallow or a dollop of coconut cream if you like.
World’s Best Smoothie
Combine in blender 2 tablespoons nut butter (I prefer natural peanut butter), 1 teaspoon unsweetened cocoa powder, 1 medium banana and enough dairy or nut milk for the fluid to reach the 1 1/2 cup mark. Blend thoroughly. Serves one.
BREAKFAST
‘Country Boy’ griddle cakes
In a medium bowl, mix together 1 cup buckwheat flour (does not contain gluten), 1 cup all-purpose flour (wheat or gluten free), 1 Tablespoon baking powder, 1 Tablespoon brown sugar, 1 teaspoon cinnamon, 1/2 teaspoon ground cloves, 1/2 teaspoon nutmeg, 1/2 teaspoon allspice and one pinch salt. Add two large eggs and 1/2 cup milk (dairy or nut). Mix well. Add water as needed to get to a consistency that is thick but somewhat pourable.
Pre-heat as many iron skillets as you have on medium-low. (I have enough to make cakes on all four burners. Use whatever you’ve got, but four skillets sure speeds things up.) Add 1 to 2 Tablespoons high-heat oil (like canola or coconut or, for dairy eaters, butter or ghee) to each skillet and swirl around to coat the bottom.
Spoon 1/4 cup rounds of batter into skillets. Working quickly, top each round with a sprinkling of raisins, apple bits or banana slices if desired. Watch cakes carefully. When the air bubbles slow down and the edges start to lift from the skillet, slide a spatula carefully underneath. If the cake lifts off cleanly, flip it and finish the cooking.
Line a large plate with paper towels and pile up cakes as they are done, dividing batches with more paper towels to soak up excess oil. (If lack of skillets slows you down, store this oven-proof plate in a low oven so cakes stay warm.) Add more oil to skillets as needed and keep frying and flipping until the batter is gone.
This recipe makes enough to serve six as a side dish. Adjust it up or down proportionally to fit your need.
Serve with vegetable soup for a hearty lunch. Cakes are flavorful alone and are also good with a touch of real maple syrup.
Frosty-Windows Oatmeal
Place 1/2 cup old-fashioned oats; 1 teaspoon brown sugar, maple syrup, honey OR molasses; 1/2 teaspoon cinnamon, and 1 Tablespoon of raisins (or any other dried fruit) in a Pyrex or heavy ceramic bowl. (If you make this breakfast a lot, use a dedicated Pyrex bowl as repeated microwaving will eventually trash your stoneware.) Add enough water to almost cover.
Microwave on high for two minutes. Stir. Add 1-2 Tablespoons of nuts and top off with a splash of nut milk or dairy milk. There you have it — a hot and healthy breakfast that’s speedy enough to make any day of the week.
Spoon-free oatmeal
This breakfast is all about preparation. Right after dinner the night before, preheat oven to 350 degrees Fahrenheit. In a medium bowl, combine 1 cup quick oats, 2 bananas and 1/2 teaspoon cinnamon.* Mash. Stir in 1/2 cup raisins and 1/4 cup chopped nuts (such as walnuts).
Drop in 3-4 inch rounds onto oiled baking sheet. (Ideal size leads to about nine cookies — or 2-3 servings.) Bake for 15-20 minutes, until rounds are solidified but not brown.
(Eat one now. You know you’re going to.) Cool the rest to room temperature and store on the counter in an air-tight container that will be easy to find in a morning stupor.
*Note that this recipe does not contain any eggs, as the bananas (which can be frozen ones that have been thawed in the microwave) are the “glue.” It also does not include sugar. Try it once without any and see if the natural fruit sweetness is enough. If it’s not. Add 1 Tablespoon of your sweetener of choice. Brown sugar would be a good one.
BREADS
Circle-the-Wagons Bread
In large bowl, mix 1 1/2 cups white flour, 1/2 cup sugar, 1 teaspoon salt and 2 packages dry yeast.
On the stove, heat 1/2 cup butter, 1/2 cup water, 1/2 cup milk slowly, stirring constantly, until smooth and creamy. Add the liquids and 4 eggs to the flour mixture and stir well.
Gradually add another 3 1/2 to 4 1/2 cups white flour and stir until dough becomes too stiff to stir anymore. In the bowl or on a floured board, knead the dough, adding flour as needed to prevent stickiness, for 8-10 minutes. Dough will be golden and springy when it is sufficiently kneaded.
Oil the dough, place in clean bowl, cover with plastic wrap or a clean towel and let rise one hour in a warm place. When dough is doubled, punch it down and split into two pieces. Shape each piece into a rectangle and brush the top with melted butter, dust with cinnamon and sugar, and sprinkle with raisins. Roll the rectangle into a tube and place in a buttered loaf pan. Cover and let rise for another hour, until nearly double in size.
Bake the loaves in a pre-heated 350-degree oven for 40 minutes until golden brown on top. Cool on racks. Slices well while warm. Or, wait for loaves to cool and enjoy as toast.
Confetti Comfort Bread
Preheat oven to 350 degrees F (180 degrees C). Butter a loaf pan. In large bowl, combine 1 carrot (peeled and grated), 1 cup raisins, 1/2 cup unsweetened apple sauce, 1/2 cup water and one banana (mashed). Add three eggs and mix well.Add two cups flour, 1/2 cup sugar, 1 teaspoon salt and 1 teaspoon baking soda and blend well. Put the batter in the prepared pan and bake one hour or until a cake tester inserted in the middle comes out clean.Cool on rack. When ready to pack lunches, either wrap up a single, thick slice or slice thinly and make sandwiches with a cream cheese filling. Mmmm.This recipe doubles well. Bake one for now and freeze one, double bagged, for later.
Fool-proof Pie Crust
Thoroughly mix 1 cup flour (rice or wheat both work just fine) and 1/4 teaspoon salt. (For sweet fillings, add a Tablespoon of sugar.)
Add 6 Tablespoons butter or plant-based shortening. Using a pastry cutter or two knives, chop the butter into the flour until the consistency is coarse. Add 2 Tablespoons water (3 if gluten-free flour is used) and 1 egg yolk. Mix with spoon or fork until barely combined. Then, gently knead by hand until well combined.
Use the heel of your hand to press into deep-dish pie pan (there’s enough dough for an 8-by-8 glass dish if you prefer). Make sure the dough is even so you don’t get goo in the middle.
Fill and bake as directed. (Use only recipes intended for open-topped or struessel-topped pies or there won’t be enough moisture.) If you need an empty shell, prick the crust all over with a fork and bake 10 minutes at 400 degrees.
Gluten-free Cornbread Stuffing
Two to three days beforehand, make two recipes of my Mountain-style Cornbread (in my recipe archive on homepage). You’re going for dry and stale. Air dry it under cheese cloth for at least 24 hours or dry it out on a low oven if you’re pressed for time.
The day before Thanksgiving (timed for the best flavor and juggling for oven time), use your fingers to crumble the rounds to bits in the largest bowl, pot, whatever that you have. Add 4-6 cups veggie stock. You’re going for moist, not soggy. Add water if needed. Set aside.
Coarsely chop four ribs of celery and four to six unpeeled apples (eating apples such as Gala are best for this). Finely dice one small onion. Sautè onion, celery and apple chunks in 1 Tablespoon olive oil until fork tender.
Mix cooked celery, apple chunks, onion and 2 cups black or golden raisins (or a mix of both if you’re feeling fancy) with the moistened cornbread. Add 1 teaspoon of salt, 1/2 teaspoon pepper and 1 Tablespoon sage and mix well. Taste. Adjust seasoning to your palate. (I use way more sage than this, but that’s me.)
Place in an oiled 9×13-inch pan and bake in a pre-heated oven at 300 degrees F for 45 minutes to 1 hour, or until golden brown on top. Cool to room temperature. Cover in an airtight way and refrigerate until a half hour before turkey is done. Let return to room temp. While the turkey is resting, pop container back into a warm oven, covered with aluminum foil, to re-warm.
Irish Soda Bread
Using butter or vegan/dairy-free substitute, grease and flour a pie plate or round cake pan. Sprinkle 1 Tablespoon of uncooked, old-fashioned oats evenly over the bottom of the pan. Set aside.
In a large bowl, combine 3 cups flour, 2 teaspoons baking soda, 1 teaspoon baking powder, 3 Tablespoons sugar, 1 pinch of cream of tartar, 1/2 cup raisins and 1 Tablespoon carraway seeds. Mix thoroughly. Set aside.
Here is where bakers can choose to use dairy or eggs or to make substitutions for non-dairy or vegan cooking. In a small bowl, combine 2 Tablespoons melted butter OR vegan substitute OR olive oil; 2 eggs OR vegan substitute; 1 cup sour cream (I recommend full fat) OR unsweetened apple sauce; and 1/2 cup dairy milk OR nut milk.
Combine the mixtures in the large bowl and stir with a non-reactive spoon until just incorporated.
Pour dough into the prepared pan and round as much as you can. Slash a quick cross into the top with an old-fashioned razor blade or an extremely sharp knife. Bake 50-60 minutes, until a deep, golden brown on top. Cool on a rack.
This recipe doubles well and freezes well. It is wonderful with soup and as toast (made in skillet, not in toaster). It is too crumbly for sandwiches, however.

Pizza Dough for 1 to 12
In a large mixing bowl, mix 5 cups all-purpose flour, 1/2 teaspoon salt and 1 package of active dry yeast. (I also like to add Italian spices and chili pepper flakes at this point, but I’d avoid this if serving children or picky eaters. I once had to explain — one at a time — to 30 or so caroling children that the colorful flecks in their pepperoni rolls were not bugs.) Set aside.
In a glass measuring cup, heat 1 1/2 cups water for 1 minute in the microwave. Stick your finger in the water. If it burns, the water is too hot and will kill the yeast. Start over with new water. If the water feels like a warm bath should, pour it into the flour mix and do an initial mixing with a sturdy spoon.
When the dough toughens beyond spoon usage, mix it some more with your fingers then begin to knead (inside the bowl, no need to make a mess on the counter) by pressing the heel of your hand firmly into the dough and shoving it down and away from you. Continue to knead, adding small amounts of flour whenever things get sticky, until the dough becomes smooth and elastic enough to spring back a bit if you poke it with your finger.
Shape the dough into a ball, place in clean bowl and pour 1-2 Tablespoons of olive oil on top, turning the ball so that it is coated with oil on all sides. Cover the bowl with a towel and set aside in a warm place to rise. (In the summer, put it outside in the sun. If it’s really cold, you may need to heat a clean sock filled with brown rice in the microwave and pop it underneath the bowl. A hot sock is a wonderful thing to keep in the kitchen.)
Check the dough after a half hour. When it is done rising, it will be about twice the size of the original ball. When you’ve reached that point, punch the dough so that it collapses! (This is called “punching down” and is way cheaper than therapy.)
This is where the 1 to 12 comes in. This amount of dough will make 12 small pizzas/ calzones, two large (10 inch) pizzas or a multitude of breadsticks/pizza bites. Figure out how you want to use it now and later and freeze what you don’t need in the correct quantity. For example, if you want two calzones at a time, split the dough into six equal portions. Set aside one portion for now and put the other five portions in separate, zip-locking bags and pop them in the freezer.
Frozen dough can be thawed overnight in the refrigerator or on the counter for a couple of hours (less if it’s a hot day). It does not need to rise again, just be thawed enough to be completely pliable.
Regardless of how you use the dough (calzones, pizza etc.), it needs to bake about 20 minutes in a 400-degree Fahrenheit oven. Check smaller items, such as pizza bites, after 15 minutes to make sure they are not getting overdone.
Mountain-style Cornbread
Preheat your oven to 400 degrees F. While the oven is heating, add 1 Tablespoon of fat to an 8- or 9- inch iron skillet. (Old-school cooks use lard. Butter tastes great. Since I am dairy free, I now use canola oil, which produces a comparable texture but doesn’t taste quite as good.) Put the skillet in the oven and let it heat.
In a medium-sized bowl, combine one cup yellow corn meal and one cup all-purpose flour (wheat or gluten free). Add 1/2 teaspoon salt, 1 Tablespoon white sugar and 1 Tablespoon baking powder and mix well. Add two large eggs, 1 cup milk (dairy or dairy-free) and (if you like the tang of buttermilk) 1 Tablespoon apple cider vinegar. Mix well.
Using a thick mitt, remove the heated skillet from the oven (close the oven door behind you to retain heat). Spoon and scrape the batter into the skillet, smoothing out the surface. Return the filled skillet to the oven and bake for 20 minutes, or until top of cornbread is golden brown. Cool five minutes, cut into wedges and serve right out of the skillet.
Pumpkin Apple Bread
Butter two loaf pans. Set aside. Preheat oven to 350 degrees F (180 degree C).
In large bowl, combine 3 cups flour, 1 teaspoon salt, 1 1/4 cup sugar, 2 teaspoons baking soda. Mix well.
In a smaller bowl, combine 2 cups (about 1 can) unsweetened pumpkin puree, 1 cup unsweetened apple sauce, 5 eggs, 1 teaspoon nutmeg, 1 teaspoon cinnamon, 1 teaspoon allspice, 1/2 teaspoon ground cloves. Mix well.
Add the wet ingredients to the dry and hand stir just until mixed. Pour into prepared pans and bake 50-60 minutes, or until a cake tester comes out clean. Cool in pans five minutes, then turn out onto rack. Enjoy alone or with apple butter or cream cheese (dairy or vegan).
Thrifty Gluten-Free Breading
Take one box of rice-square cereal. Snip off a corner of the bag to release trapped air. Fold the corner over and hold it firmly shut, then use a non-sharp kitchen tool or the heel of your hand to crush the cereal into course grains. (Don’t get too zealous. You don’t want powder.) Store the breading like any other cereal product in a zip-locking plastic bag. Done.
Use the breading in any kind of pattie or ball — everything from salmon cakes to latkes to veggie balls. Mix it with Parmesan cheese, nutritional yeast or spices on top of a baked pasta dish for a crunchy topping. Mix it with wet ingredients like oil, egg or mustard and use it to coat things like zucchini fries or eggplant cutlets. It even makes a passable “graham cracker” crust.
DESSERTS
Apple Harvest Cake
Preheat oven to 325 degrees F. Butter and flour a bundt pan. Set aside.
In a large bowl, combine 1 1/4 cups white flour, 1 cup whole wheat flour, 1/2 cup white sugar, 1/3 cup brown sugar, 1 Tablespoon molasses, 1 Tablespoon cinnamon, 2 teaspoons baking powder, 1 teaspoon salt, 1/2 teaspoon baking soda. Mix thoroughly. Set aside.
In a small bowl, combine 3/4 cup oil or unsweetened apple sauce, 1 teaspoon vanilla and 3 eggs. Add the wet ingredients to the dry and mix thoroughly.
Gently fold in 2 cups peeled and chopped apples, 1 cup chopped walnuts and 1/2 cup black or golden raisins.
Spoon mix into prepared pan, smoothing the top of the batter as much as possible. Bake 50-65 minutes, until cake tester comes out clean. Cool upright in pan 15 minutes. Turn out onto a serving plate and cool to room temperature. If desired, glaze with a mix of 1/2 cup powdered sugar, 1/4 teaspoon vanilla and 2-3 teaspoons dairy or nut milk.
Bake Sale Brownies (low cost, high return)
Prepare one box inexpensive brownie mix according to package directions. Add one extra egg and 3 Tablespoons instant coffee granules and mix until moistened throughout. Pour mix into prepared pan. Sprinkle the top generously with 1/2 bag semi-sweet chocolate chips. Bake as directed on the box. Cool completely. Cut into 12-18 pieces for single servings or into one-inch squares for a party tray.
(Some added twists. If someone is dairy free, use a dark chocolate chip. If you like nuts, layer walnut halves on the bottom of the pan before carefully pouring in mix. If you are fund-raising, cut the brownies into 12 rectangles, wrap each with waxed paper and tie with a yarn bow. Put a label on the tray that says “Double-Chocolate Mocha Brownies,” and you’ve probably doubled your selling price. Seriously. People like chocolate that much.)
Choco-nut Nice Cream
(This soft-serve recipe depends on frozen bananas. There is a market in our city that sells bananas in slightly blackened peels 10 for $1. This is the degree of ripeness that you want. Stock up, peel them, toss them in a zip-locking bag and freeze them until ready to use. They oxidize a bit, but will remain tasty for 2-3 months. These are also great eaten frozen-treat style with a paper-towel wrapper or thawed and made into banana bread.)
Back to the nice cream. In a quality blender, mix 2-3 frozen bananas broken into chunks, 2 teaspoons cocoa powder, 2 Tablespoons natural nut butter (I used a peanut butter that contains only peanuts) and enough nut milk (I used cashew-almond blend) for the liquid to meet the 2 cup mark. (Experiment. The more frozen bananas, the more spoonworthy the nice cream.)
Blend on the chop setting until bananas are broken into small pieces. Crank it up to high speed and mix thoroughly. Eat immediately. Makes 2 servings.
Grapefruit Gum Drops
Candy making happens quickly and requires adult supervision. Do not start this recipe until you have completed steps 1 and 2.
- Equipment: Line an 8- by 4-inch loaf pan with aluminum foil that extends over the edges on the long sides. (This is to allow you to pull out the hardened candy in one piece.) Coat the foil with cooking spray or a light smear of Crisco. Set aside. Next, put two heavy-bottomed kettles on your stove. One should hold at least 1 1/2 quarts. The other should hold at least two quarts. You will also need a candy thermometer and two, long-handled spoons.
- Ingredients: Do all the assembly and measurements now. You will need 1 cup granulated sugar, 1 cup light corn syrup, 3/4 cup freshly squeezed and strained red grapefruit juice, 1 teaspoon red grapefruit zest minced into oblivion, 1 1.75-ounce package of powdered fruit pectin, 1/2 teaspoon baking soda, 1-2 drops red food coloring (optional) and 1/2 cup sugar (pink, white or a mix of the two) for dusting
Now, in the smaller kettle, combine the sugar and corn syrup. Turn heat to medium-high and cook, stirring constantly, until sugar is dissolved and mixture is boiling steadily across the surface. Once that boil is reached, reduce the heat to medium, stop stirring and insert the candy thermometer on the side of the pan. Heat mixture about 7-10 minutes until it reaches 280 degrees F (soft-crack stage).
While this mixture is cooking in the no-stir stage, combine grapefruit juice, pectin and baking soda in the other pan. Bring to boil over medium heat, stirring constantly. Remove heat when boil is reached.
Working very quickly, turn off heat as soon as sugar mixture reaches 280 degrees. Bring juice mixture back to a boil and pour sugar mixture into the juice mixture in a thin stream, stirring constantly. Cook 1 minute more, stirring constantly. (A second cook in the kitchen can be helpful here. Have one person stir and the other pour.)
Remove from heat. Add zest and food coloring. Pour mix into the prepared loaf pan and let stand at least two hours at room temp or until firm enough to cut.
Using the foil edges, lift the candy from the pan and place on cutting board. Cut into a 4 by 8 grid using a large chef’s knife. Remove the foil backing. Roll each cube in the dusting sugar. Store in an airtight container at room temp for up to two weeks.
A note: Clean up is not as hard as it will look. Water dissolves sugar very well. Just soak everything before hand washing or putting it in the dishwasher.
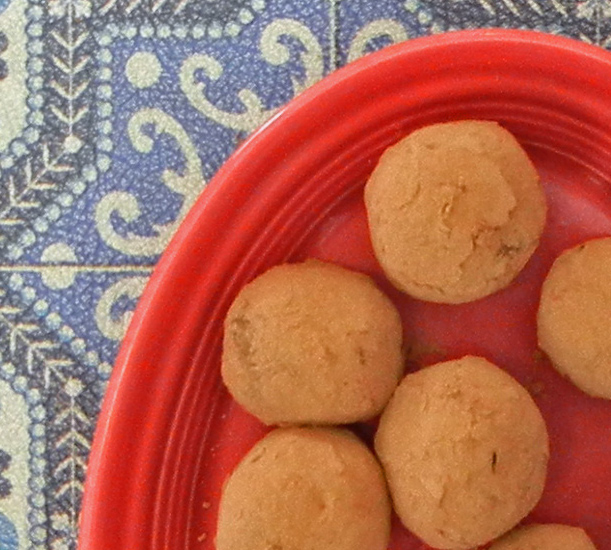
Dark Chocolate-Strawberry Truffles
Weigh out and finely chop 9 ounces of dark chocolate — dairy free if you want to keep it vegan. (I did this with a chef’s knife, but later learned that a serrated knife is better.) Set chocolate aside in a medium-sized bowl.
In a small pan, heat 6 Tablespoons of canned, full-fat coconut milk (or heavy cream if you eat dairy) and 1 Tablespoon of smooth and seedless strawberry jam to the point at which tiny bubbles begin to appear. Before a boil can commence, quickly pour the coconut milk over the mound of chocolate pieces and put a lid over the bowl to trap the heat.
After five minutes, add ½ teaspoon vanilla and gently stir until the mix is smooth and shiny. Cover the resulting ganache with a thick towel or cling wrap and let it cool on the counter just until a table knife inserted into the mix comes out clean.
(The counter cooling is slower, but the local expert said refrigerator-cooled ganache tends to get grainy.)
When the ganache is ready, use a measuring Tablespoon to scoop up the mix, shape it into balls with your hands and then dredge each through unsweetened cocoa powder. Don’t overdo the cocoa like I did in the photo or it will literally make you cough between bites — not a good thing during a pandemic.
Yields 1 dozen truffles.
Iron Skillet Apple ‘Pie’
Thinly slice (but don’t peel) one large eating (not baking) apple per serving. (Galas work well for this.) Place the slices in an iron skillet (8-9 inches diameter works best if you’re serving four or more).
Add 1/2 Tablespoon of unsalted butter per serving. (Yes, you can use oil if you’re dairy free or vegan, but it won’t taste quite as good.) Add 1/2 cup of water. Add 1 teaspoon each of cinnamon, allspice and nutmeg and 1/2 teaspoon ground cloves.
Cook over a low flame for as long as an hour, stirring occasionally and adding more water whenever the mix begins to dry out. It’s done when slices are limp but intact and are surrounded in rich, gooey sauce.
Turn off the heat about 10 minutes before you plan to plate the apples. Taste the sauce once. The apples are naturally quite sweet, but will taste best if you add a small amount of sweetener such as molasses, honey or brown sugar. Stir and taste again. Add more sweetener only if needed.
(Larger quantities of this can be made ahead and refrigerated, but tend to turn into more of an apple sauce texture.)
Serve alone, with a crunchy topping such as granola or, if you want to go all out, with some vanilla ice cream or nice cream. This is also good over morning toast or in oatmeal. Enjoy!
Moo-free Dreamsicle Cake
Using two 8- or 9-inch cake pans coated with oil and dusted with flour, prepare one box of Duncan Hines (or another dairy-free brand) orange cake according to package directions. Likewise, use one of the pans to prepare one-half a box of dairy-free vanilla box cake mix. (If halving the recipe requires a half egg, just add a full egg instead. Also, if you don’t want to save the extra half of the mix for a later day, just make both layers and freeze the extra one. Serving it cut into cubes with fresh fruit is one idea.)
Cool the two orange and one vanilla layers to room temperature. Place an orange layer on a cake plate or stand (tucking three strips of waxed or parchment paper under its edge for tidier frosting later). Top the first layer with about 1/4 inch of orange marmalade (for mature taste buds) or peach jam. Add the vanilla layer. Repeat the marmalade/jam layer. Top it all off with the second orange layer.
Dust loose crumbs off the cake and frost with canned (dairy free) vanilla frosting. (Again, Duncan Hines makes a quite good one.) Carefully remove the paper strips and clean up any frosting smears.
Serve in 10-12 generous slices with vanilla nice cream and — if you want to get fancy — a sprinkle of candied orange peel. (I did the orange peel, which seriously boosted my street cred in and outside the family. Kitchen alchemy…)
Strawberry Pavlova
Preheat oven to 250 degrees F and line a large cookie sheet with parchment paper. Set aside.
Put three egg whites in a large mixing bowl and bring them to room temperature. Using an electric mixer, whip the egg whites until they form peaks like whipped cream, but not so long that they lose their glisten.
Add 10 Tablespoons of white sugar, one spoon at a time, and mix thoroughly after each addition. (The slowness of this preserves the volume of the mixture.)
Add 1 teaspoon vanilla and 2 Tablespoons sugar and fold into the mixture. Don’t over stir.
Drop large spoonfuls onto the cookie sheet and shape into discs. This recipe should make about 10 4-inch rounds.
Place the sheet in the oven and bake for 1 hour. Turn off the oven but leave the door closed and the cookie sheet inside. Let meringue shells continue to dry for 6 hours.
Remove from the oven and store meringues in an airtight container until ready to use. To make pavlovas, top each round with either whipped cream or ice cream (for the dairy free, use nice cream) and fresh or crushed berries.
MEAT/SEAFOOD
Faux Italian sausage
Put 1 to 1 1/2 pounds fresh or thawed ground turkey (I use 93 percent lean) in an iron skillet. Add 1/2 cup water. (Water is needed because turkey is so very low fat.)
Turn heat on medium and begin cooking, using a spatula or spoon to break the meat into crumbles as it cooks. Add water and reduce heat if needed to prevent meat from burning. Continue cooking until water is evaporated and there is no pink remaining in meat.
Remove from heat. Add 2-3 teaspoons of Italian seasoning (as in basil, oregano etc.), 1 teaspoon fennel (critical for that “sausage” flavor) and 1/2 teaspoon red pepper flakes. Mix well.
This recipe is great as a pizza topping or calzone filling; in any sort of pasta dish, including lasagna; and in soups such as homemade versions of Zuppa Toscana (Olive Garden classic). It is also delicious over plain, white jasmine rice — add a veggie and this meal will be on the table in less than 30 minutes.
Faux sausage stores well in an airtight container in the refrigerator. If you can’t use this up in a day or two, pop it into the freezer.
Lemony Salmon Spread
Drain one can of wild-caught pink salmon. Using your fingers, either remove visible skin and bones or (as I do) mash them thoroughly for added nutrition. Add the juice of one freshly squeezed lemon, 1/8 teaspoon of pepper, about 1/2 teaspoon finely minced rosemary (use less if using dried) and 1 Tablespoon olive oil. Mix well.
Use this spread with cooked pasta, on excellent baguettes, with pita crisps etc. Combined with a salad or a fruit and veggie tray and something chocolate (check my recipe archive for Bake Sale Brownies), it’s a simple but delightful way to round out the summer beach season.
Moo-free Salmon Bake
Preheat oven to 350 degrees F. Coat a baking dish (a Dutch oven or 9-by-13-inch Pyrex dish works well) with coconut oil or some similar dairy-free alternative. Set aside.
Put one can of drained, wild-caught salmon into a medium bowl and crush skin and bone bits well. (I crush rather than remove such parts. One, if I’m going to eat meat, I don’t want to waste. Two, those bones are loaded with nutrition.) Set aside.
In a blender or food processor, mix 1 cup water, 1 cup unsalted cashews, 1-2 Tablespoons nutritional yeast (has cheesy flavor) and 1 teaspoon salt. Set aside.
Cook one 12- to 16-ounce box of small wheat or gluten-free pasta (like rotini or elbows) according to directions. Return pasta to cooking pot and add the salmon and the cashew sauce. Mix. Taste. Add more salt and pepper to taste. Add 1 large egg and 1 cup frozen sweet peas and mix again.
Put the mix into the prepared dish. Top with crumbled rice squares (the gluten-free cereal) and a light sprinkle of paprika. Bake 30 minutes and serve while warm. (Oddly enough, one daughter and I like to add ketchup on top for full-on comfort food.)
* Vegans and vegetarians: You know what to do. Leave the salmon out and, for vegans, substitute for the egg. 🙂 It’s still yummy. Blessings!
Quality Chicken Nuggets
Preheat oven to 375 degrees. Cut chicken breasts into strips that are no larger than a deck of cards. (You’ll need about 2 pounds of chicken to serve 6.) Set aside.
Pour 2 Tablespoons olive oil and 1 Tablespoon dijon mustard onto a large dinner plate. Mix with a fork. Set aside.
Put 1 1/2 cups smashed (not powdered) rice squares (a gluten-free cereal), 1 Tablespoon Parmesan cheese or nutritional yeast flakes (for the dairy free), 1 Tablespoon Italian seasoningand 2 Tablespoons finely chopped, unsalted cashews into a gallon plastic bag with a zip lock. (A tip: For speed, I skip the cashews if I make this on a weeknight. It’s good without, crazy good with.) Close the zip lock and shake to mix.
(The quantities of oil/mustard and breading are enough for 4-6 servings. If you’re doing more, you’ll need more of both mixes.)
As this can be messy, set up an assembly line with the chicken breasts on one end, then the plate of oil and mustard, then the bag of breading, then a cookie sheet (or two) lined with foil or parchment paper. One strip at a time, roll the chicken in the oil/mustard, then place in the bag of breading and flip around to coat thoroughly. Lay the strips on the cookie sheet with at least 1 inch of space all around.
Bake for 30-35 minutes, checking for excessive browning toward the end. (Cooking time varies by the size of the strips.) Check for doneness by cutting the largest strip open at its thickest point.
This recipe goes particularly well with rice pilaf or pasta in an alfredo or dairy free al-faux-do sauce. (See my recipe archive for the non-dairy sauce recipe.) If, by some miracle, you have leftovers, store them with a moisture-absorbing paper towel in an airtight container in the refrigerator. Cut into bite-sized pieces, they are excellent in a salad meal the next day.
Slow Chicken Pot Pie (dairy free, gluten free)
This is a multi-step recipe. It makes the most sense to begin with the pastry, even though you won’t need it until the end. In a medium-sized mixing bowl, combine 1 cup gluten-free flour (wheat flour is just as good if you’re not gluten-free) with 1/4 teaspoon salt. Add 6 Tablespoons olive oil, 2 Tablespoons cold water and one egg yolk. Mix a bit with a spoon, then knead with your fingers until you have a smooth ball of dough. Cover and set aside at room temperature.
Next, put 1 1/2 cups unsalted cashews in your blender. Add 1 cup water, 1 teaspoon salt and 1 teaspoon dried or powdered onion. (This combo gives this faux bechemel/white sauce some serious umami). Cover and set aside for mixing later.
Now, peel and thinly slice about 5 large carrots. Put in a wok or large skillet with 1 package frozen peas, 1 package frozen corn and about 1 to 1 1/2 pounds diced chicken breasts. Saute it all in olive oil until chicken is thoroughly cooked and carrots are fork tender.
Preheat oven to 350 degrees Fahrenheit. Oil the inside of a large iron skillet or 9×9-inch Pyrex dish. Blend the cashew mix until creamy in texture, check the fluid level and add a bit of water if you have less than two cups. Pour the cashew cream into the vegetables and chicken and mix everything in the skillet/wok. Put the whole lot in the prepared skillet/Pyrex dish and smooth with the back of a spoon.
In a final step, tear off pieces of the pastry and flatten them into 1/4-inch thick patties with your hands. Place these all over the top of the chicken/veggies/cashew cream, covering as much of it as possible. If you manage to completely cover it, use a knife to cut a few steam vents. Bake the pie in the oven for about 20 minutes. Gluten-free pastry can burn very quickly. You’re going for “done,” not “golden brown.”
PASTA and PIZZA
On-Vacation Pasta Salad
Cook one 12-ounce box of pasta in generously salted water according to directions. Drain and set aside.
Halve one pint of grape tomatoes. Place in skillet with small amount of water or olive oil and cook until tomatoes are soft and a thick juice has developed. (Add more fluids during the cooking process if you are losing your sauce.) Season with salt and pepper.
Combine the pasta, the tomatoes and a tub of prepared hummus. Serve immediately with a simple salad. Done!
Dairy-free (and vegan) Pizza Toppings
Soffritto — This is basically an Italian version of finely chopped stir-fry. Carrots, celery and onions are traditional. I chop more coarsely (see top picture), cook whatever I have (garlic, kale etc.) in a bit of olive oil, and throw on a lot of Italian herbs at the end. If you pile this thickly enough over your sauce layer and sprinkle with nutritional yeast (which has a cheesy flavor) after baking, you won’t even be able to tell there isn’t dairy. (Freeze any leftover soffritto to use later in soup.)
Melted peppers and onions — In an iron skillet and on the lowest burner setting, cook colorful sweet peppers and yellow onions cut into strips in olive oil. Stir occasionally and keep cooking until veggies are so limp they appear to have “melted.” This may take as long as an hour. Add a splash of apple cider vinegar and salt and pepper to taste at the end. (This recipe can be stored in a jar in the refrigerator for a week or frozen for later soup use.)
Pickled onions — You can do this the fast way, with a heated vinegar sauce, or the slow way. I like the slow way, which yields a crunchier onion. Chop one red onion into strips. Cover with apple cider vinegar or red wine vinegar mixed with 1 teaspoon white sugar. Store in a tightly-sealed glass container at room temperature for 1 to 3 days. These onions should be added after baking for a bit of crunch, color and tang. (Leftovers can be stored in a jar in the refrigerator for a week.)
Iron-skillet, deep-dish pizza
In a medium-sized mixing bowl, combine 1 1/2 cups brown rice flour (for gluten free) OR all-purpose wheat flour (for gluten eaters) with 1/2 cup yellow corn meal. Add 1 Tablespoon dry yeast, 1 Tablespoon sugar and 1/2 teaspoon salt. Mix thoroughly.
Add 3/4 cup warm water. Stir, then hand mix/knead until you have a smooth lump of dough. Cover with a clean towel and set aside in a warm place. (In the winter, I recommend putting a cotton sock filled with brown rice and microwaved to a skin-comfortable temperature underneath the bowl for faster rising.)
When the dough has risen at least a half hour (this mixed-grain dough will not rise as dramatically as a wheat-only crust no matter how long you wait), pre-heat the oven to 400 degrees F.
While the oven is heating, add 2 Tablespoons olive oil to a nine-inch iron skillet. Swirl to coat the entire bottom of the skillet and as much of the side as you can without dripping oil. Put the oiled skillet in the oven for 10 minutes to heat. (This critical step allows the crust to carmelize.)
Carefully remove the heated skillet and place it on a burner rack on the stove. Dump the dough into the skillet. Holding the skillet handle with a pot holder on one hand, use an old-fashioned potato masher or the bottom of a Pyrex measuring cup to shape the crust so that it covers the bottom of the skillet and comes all the way up the side like a pie crust. (If you are using a wheat crust instead of gluten free, you will be able to hand shape the dough before you put it in the skillet and just tweak it when it’s in.)
Being careful not to burn yourself on the skillet, cover the bottom of the raw crust with vegan cheese (3 Daiya provolone-style slices cut in half rounds works really well) or whole slices of dairy cheese. (Putting the cheese on the bottom prevents the abundance of sauce from soaking the crust.)
Add whatever toppings you are using. (I used sauteed mushroom bits, but you can see my recipes archives for other vegan pizza topping ideas.) Top the whole thing with 1 1/2 to 2 cups good-quality pasta sauce. (I like Aldi’s organic marinara.)
Bake for 30-35 minutes, or until the crust is golden brown on its top edge and the sauce looks somewhat “set.” So that slices will come out as an actual slice (I am not kidding on this one — you will have a literally hot mess), let the pie cool on a burner rack for 10-15 minutes.
Serves 4-6. Leftovers, as if, refrigerate well.
Pizza Dough for 1 to 12
In a large mixing bowl, mix 5 cups all-purpose flour, 1/2 teaspoon salt and 1 package of active dry yeast. (I also like to add Italian spices and chili pepper flakes at this point, but I’d avoid this if serving children or picky eaters. I once had to explain — one at a time — to 30 or so caroling children that the colorful flecks in their pepperoni rolls were not bugs.) Set aside.
In a glass measuring cup, heat 1 1/2 cups water for 1 minute in the microwave. Stick your finger in the water. If it burns, the water is too hot and will kill the yeast. Start over with new water. If the water feels like a warm bath should, pour it into the flour mix and do an initial mixing with a sturdy spoon.
When the dough toughens beyond spoon usage, mix it some more with your fingers then begin to knead (inside the bowl, no need to make a mess on the counter) by pressing the heel of your hand firmly into the dough and shoving it down and away from you. Continue to knead, adding small amounts of flour whenever things get sticky, until the dough becomes smooth and elastic enough to spring back a bit if you poke it with your finger.
Shape the dough into a ball, place in clean bowl and pour 1-2 Tablespoons of olive oil on top, turning the ball so that it is coated with oil on all sides. Cover the bowl with a towel and set aside in a warm place to rise. (In the summer, put it outside in the sun. If it’s really cold, you may need to heat a clean sock filled with brown rice in the microwave and pop it underneath the bowl. A hot sock is a wonderful thing to keep in the kitchen.)
Check the dough after a half hour. When it is done rising, it will be about twice the size of the original ball. When you’ve reached that point, punch the dough so that it collapses! (This is called “punching down” and is way cheaper than therapy.)
This is where the 1 to 12 comes in. This amount of dough will make 12 small pizzas/ calzones, two large (10 inch) pizzas or a multitude of breadsticks/pizza bites. Figure out how you want to use it now and later and freeze what you don’t need in the correct quantity. For example, if you want two calzones at a time, split the dough into six equal portions. Set aside one portion for now and put the other five portions in separate, zip-locking bags and pop them in the freezer.
Frozen dough can be thawed overnight in the refrigerator or on the counter for a couple of hours (less if it’s a hot day). It does not need to rise again, just be thawed enough to be completely pliable.
Regardless of how you use the dough (calzones, pizza etc.), it needs to bake about 20 minutes in a 400-degree Fahrenheit oven. Check smaller items, such as pizza bites, after 15 minutes to make sure they are not getting overdone.
SALADS
Cucumber and Onion Salad
Using a vegetable peeler, remove most (but not all) of the skin of an English (seedless) cucumber. Rinse once more, remove both ends and slice into 1/8- to 1/4-inch rounds. Put in a large bowl and set aside.
Cut one red (best color combo) or yellow (sweetest) onion in half from root to tip. Skin the one half, cut off both ends and slice (from side to side) in thin half rings. Separate the rings with your fingers and add to the cucumber bowl. Seal the rest of the onion in an airtight container and refrigerate up to one week until ready to use for something else.
Toss with 2 Tablespoons vinaigrette. (Try my Summer Sun Vinaigrette from my recipe archives, use a bottled dressing, or make your own simple one from olive oil, red wine vinegar, salt, pepper, chopped garlic and a teaspoon of sugar.)
Serve with crusty bread, a pasta dish, quiche, sandwiches, veggie burgers — whatever is on your summer menu.
This recipe serves four. It does not store well. Reduce the recipe if you cannot eat this in one sitting.
Edamame Salad
Steam one package of frozen edamame according to package directions. Chill in the refrigerator.
In a large bowl, combine one red pepper (finely diced), 1/2 cup fresh parsley leaves, one green onion (finely diced), 1 Tablespoon olive oil, 1/4 cup soy sauce and 1/4 teaspoon hot sauce. (Another colorful option: Consider adding one peeled and grated carrot.)
Add the chilled beans to the bowl ingredients. Toss until thoroughly mixed and serve. Store leftovers in a tightly covered container in the refrigerator for up to two days.
Fruity Cabbage Slaw
Coarsely chop 2 cups each of green/white cabbage and colorfully-skinned apples such as Gala or Fuji (leaving peels on). Add one cup loosely packed black raisins and toss until well combined.
In a small bowl, combine 1 cup mayonnaise (vegan or otherwise), 2 Tablespoons apple-cider vinegar and 1 Tablespoon white sugar. Mix until smooth.
Add dressing to the cabbage and fruit mixture and toss until lightly coated. Serve immediately or refrigerate no more than a few hours. Top with a few handfuls of walnut pieces just before serving.
Grape and Citrus Salad
Grate the zest of one orange into a large mixing bowl. Detach, rinse and halve 10 seedless red or black grapes per serving. Peel, seed and dice one half a full-sized orange (or the volume equivalent of smaller citrus) per serving. Add the grapes and citrus to the zest.
Add 1 Tablespoon frozen orange juice concentrate to the bowl and toss the ingredients until lightly coated. Serve immediately or briefly chilled, topped with toasted nuts. Just don’t put the nuts on too early, or they will lose their crunch.
Melon-berry-‘mater-mint Salad
Cube one seedless, red watermelon, removing all the rind. Place cubes in a large mixing bowl and set aside.
Wash and halve one pint of red cherry or grape tomatoes. Add to the bowl. Wash, hull and slice 1 pound of strawberries. Add to the bowl.
Add 1-2 teaspoons of balsamic vinegar, the juice of one lemon, 1 Tablespoon of olive oil and several grindings of black pepper to the bowl. Gently stir to coat and mix. Top with a handful of fresh, de-stemmed mint leaves.
Spring-Forward Salad
Rinse your greens (I used about six cups of red-leaf lettuce and flat-leaf parsley, which serves four to six) and pat them dry with a clean kitchen towel. Tear them into bite-sized pieces (removing tough stems) and place them in a large mixing bowl. Add any other vegetables or fruit that you are using, chopped into bite-sized bits. (I used red peppers.)
Add 2-3 cups prepared quinoa (either pre-cooked or cooked and cooled if you are cooking it yourself).
In a measuring cup or small bowl, combine 4 Tablespoons olive oil, the juice of one lemon, 1 Tablespoon honey (agave nectar for vegans), 1 teaspoon Dijon or stone-ground mustard, 1 teaspoon ground pepper, 1/4 teaspoon salt and one garlic clove (finely minced).
Whisk the dressing with a fork. Immediately pour it into the salad bowl and toss lightly, until all is well coated.
Top each serving with 2 tablespoons chopped nuts of your choice. (I picked unsalted cashews). Add a smoothie (see my recipe archive for the vegan World’s Best Smoothie) and you’re golden — healthy, spring-light and out the door.
SAUCES and CONDIMENTS
Al-faux-do Sauce (vegan cheese)
1 1/2 cups unsalted cashews, water, 1-2 Tablespoons nutritional yeast*
Put the cashews in a blender. Just barely cover with water and let soak for at least one hour. Just before serving, add the nutritional yeast and blend at high speed until thick and creamy.
Use it anywhere you need heavy cream or a cheesy sauce. Throw in a whole bunch of basil before blending and you’ve got yourself a tasty pesto.
* Nutritional yeast can be found in most grocery stores’ health food section. It is a cheesy-tasting supplement vegans use to get certain vitamins into their diet. In spite of looking exactly like fish food, it’s also great on popcorn or anywhere you would normally use parmesan.
Barbecue Bliss Sauce
Place one finely minced onion and two minced garlic cloves in the bottom of a sauce pan with 2 tablespoons of butter or olive oil (for the dairy free among us.) Saute until onions are translucent.
Add 1/4 teaspoon salt, 1 Tablespoon chili powder, 4 Tablespoons brown sugar, 4 Tablespoons apple cider vinegar, 4 Tablespoons Worcestershire sauce (which is not vegan or even vegetarian unless you purchase a specialty version), 1 cup ketchup and 1 teaspoon hot sauce.
Cook over lowest flame until sauce is thick and glistening. Use as a marinade for grilling or mixed with pre-cooked and shredded meat or pre-cooked lentils/beans if you’re in a hurry. If you have more time, put all the raw ingredients into a slow cooker with 2-3 pounds meat (I like chicken breasts with this) and cook until you have a savory stew. In the American South, the latter would be served on a bun and topped with coleslaw.
If you have some sauce left, you will not be sorry if you use it as a dip for ranch fries.
Dandelion Jelly
Gather one quart of fresh dandelion flower heads in a place that is free from chemical applications and heavy dog or car traffic. Working quickly (the blooms fade rapidly), rinse them and pull off as much of the bitter-tasting green parts as possible. (This can be messy and will reveal the occasional ant. It’s best done outside if possible.)
Put the blooms in 2 quarts boiling water. Boil for three minutes. Use a fine strainer (pressing the petals to get all the liquid out) and reserve 3 cups of the liquid. (Or, do what I did: Tie up the blooms in a clean, white dishtowel and skip the straining process. Plus, you’ll have a dandy-yellow towel when you’re done. )
In a large kettle, bring 3 cups of the dandelion liquid, 6 Tablespoons fruit pectin and 2 Tablespoons freshly squeezed lemon juice to a boil.
Stirring constantly, add 5 1/2 cups sugar and return to boil. Boil 2-3 minutes.
If you will be using or giving away fairly quickly, skip the hot water bath and simply ladle into about 6 half-pint canning jars and hand seal with canning lids or paraffin after the jelly has cooled. For longer storage, which can be done at room temperature, process the filled jars in a hot-water bath.
Unprocessed jars and processed jars that have been opened should be stored in the refrigerator even though the high sugar content makes it difficult for bad bacteria to take hold.
This light jelly is best enjoyed on toasted white bread.
Grandmother Moore’s Tomato Relish
*Chop a dozen 2-inch diameter onions and 6 small green peppers. Peel 1 peck (about 12 pounds) ripe tomatoes by quickly dipping them in boiling water, then sliding off the skins. Chop the tomatoes into small cubes.
In a large pot, combine the tomatoes, onions and peppers with 1 lb. brown sugar, 3 Tablespoons salt and six whole hot peppers.
Simmer for two hours, until very soft. Add 1 pint apple cider vinegar, 1/2 Tablespoon allspice, 1 Tablespoon cinnamon, 1/2 teaspoon ground cloves and 1/2 teaspoon paprika. Simmer another hour, stirring frequently.
Remove hot peppers and ladle the relish into sterilized (dishwasher cleaned or heated in boiling water) glass jars. Either process lidded jars in a hot-water bath or store the jars of this high-acid product in the refrigerator and use within 4-6 weeks. For longer storage, let cool to room temperature and repack in freezer-safe, tightly sealed containers. Can freeze about six months.
In Appalachia, this kind of relish is often served with grilled meat, such as burgers or hot dogs, and is generally called “chili sauce.” That is tasty, but I like it even better served as a small side to a curried stir fry — chutney style. Honestly, this is so good, I can also see just eating it off a cracker or with some hearty bread.
*This recipe — handwritten, of course — uses charming units of measurement like “pecks” and “small dishpan full.” This means amounts are approximate. Don’t let that throw you. If great-great-great-great grandma could do it, you can, too!
Lemon Mayo
Combine 6 Tablespoons of jarred mayonnaise (vegan or non-vegan), the finely minced zest of one lemon and the juice of the same. Stir until smooth.
Use what you like and store the rest in the refrigerator for up to a week — re-stirring if needed to achieve creaminess.
Liz’s Autumn-Garden Pesto
Toast about one cup of walnuts in a skillet. (Walnuts bring a rich taste of autumn to this pesto, but don’t be discouraged if you don’t have any at hand. Experiment with what you have.)
In food processor*, combine the nuts, two cloves of garlic, sea salt and white pepper to taste. Pulse. Add about two cups of loosely packed basil leaves and pulse about six more times, adding some extra virgin olive oil near the end.
Pack the pesto in a jar, topping it with a bit of olive oil to keep it from browning before use. Stores well in refrigerator for a few days.
* If you don’t have a food processor, a good chef’s knife or a hand chopper and some time can achieve similar results.
MacGyver Chocolate Sauce
This recipe is entirely about proportions. For enough sauce to provide a topping for four-to-six servings of fresh fruit, put 1 cup semi-sweet or dairy-free chocolate chips into a Pyrex dish (like a measuring cup). Pour in dairy or nut milk (I prefer cashew milk) until top of milk/nut milk is just below the top of the chocolate. Microwave 45 seconds to one minute.
Test for doneness by stirring for 30 seconds. If you have reached the proper temperature, the morsels and milk will combine into a smooth, creamy sauce the texture of mayonnaise.
This base can be used as is (cool to room temperature for fresh fruit) for a topping or dip. If you want a glaze, add a little more milk/nut milk. If you want frosting, add powdered sugar and softened butter/vegan substitute and mix with an electric mixer until you have the desired consistency. If you want a drink, make the base first, then add enough milk/nut milk to get a drinkable texture and stir thoroughly. Drink this hot or cold, only adding sugar if you absolutely must.
Summer-Sun Vinaigrette
Combine 4 Tablespoons extra-virgin olive oil, 1 Tablespoon honey, the juice of one small lemon, 1 finely minced garlic clove, 1/4 teaspoon salt, 1 teaspoon pepper and 1 teaspoon dijon mustard. Let the mix sit at room temp while you’re prepping whatever it is you’re serving. When you’re ready, whisk the sauce mix with a fork until well combined and immediately apply.
This vinaigrette is yummy over quinoa, which can be kind of bland and gritty if not dressed in something oily. It is also wonderful over vegetables and salad. Other possibilities are as a marinade for grilling or as a pasta sauce. It’s not a great dipping sauce for bread as the ingredients rapidly separate out if they’re not coating something.
Now that I think about it, this is technically not a “vinaigrette” as I removed the vinegar from the original recipe and punched up the lemon juice. If you’re a name purist and like lots of tang, add a splash of cider vinegar. 🙂
SIDES
Fancied-up Box Stuffing
Start with a box of stuffing mix. (There are many varieties to choose from, including ones that are vegetarian and/or gluten free. You pick.) Prepare the mix according to box directions. Set aside.
In a wok or large skillet, combine two coarsely chopped apples (peel on), a 1/2 cup of finely minced onion and two ribs of thinly sliced celery. Saute in 1 Tablespoon olive oil about seven minutes or until just fork tender.
Combine fruit and veggies with prepared stuffing. Add one cup black or golden raisins (or a mix if you’re really fancy). Gently stir.
If you are eating this right away, put in a microwavable serving dish and re-heat for no more than a couple of minutes before serving. If you are serving later (this recipe improves with a day or so of age), cool and store in the refrigerator in an airtight container. Re-heat before serving in a low-temp oven (covered with foil) or in microwave (covered with a paper towel).
This recipe serves 4-6. When doubled — which it does well — it will fill a 9- by 13-inch dish.
Souped-up Rice
Puree one cup of leftover soup. (Vegan butternut, vegetable and lentil soups are great choices as they puree well and there is no dairy to scald.) Put the soup and about 1 1/2 cups of water* in a sauce pan. Bring to boil.
Add 1 1/2 cups rinsed jasmine rice, cover and simmer on low for 15 minutes or until liquid is absorbed. Turn off heat, let rest five minutes and then fluff with a fork. Taste. Add a bit of salt and pepper if needed.
*The thicker the soup puree, the more water you will need for the rice to cook properly. Experiment. If the water/soup mix looks too thick at the start, add a bit more water and increase the cooking time. Check as the liquid cooks out to make sure your rice is not burning on the bottom of the pan.
Speed-of-Light Baked Beans
Wash, seed and coarsely chop about ½ pound sweet peppers (yellow, orange or red makes the prettiest end product) and one jalapeno pepper. Halve and peel one yellow onion, slice thinly so that you’re left with half rings you could almost read through.
Put 1 Tablespoon olive oil in an iron skillet and slowly cook (not burn!) the peppers and onions until they are so soft they look melted. Add 1 Tablespoon apple cider vinegar. Stir and turn off heat.
In a large iron skillet or a Dutch oven (an enameled iron cooking pot), empty two 28-ounce cans of prepared baked beans. (Vegans need to check ingredient labels here. I found a version I like at Aldi.) Open a 16-ounce can of butter beans (don’t substitute another bean or you won’t get the right level of salt-pork-like creaminess). Rinse the butter beans, drain them and remove the weird empty bean casings that tend to rise to the top.
Add the cooked peppers and onions, stir. Put on a lid or some aluminum foil and bake up to one hour in a 300 degree F oven. Ten minutes before serving, take off the lid, turn off the heat and let a slight crust form. (Or, if you’re really in a hurry, put it all in a pan and simply heat through on the stove top. Not quite as good, but still tasty.)
Serves six. Doubles well. If you have leftovers, freeze them in one-cup portions and add one serving to a pot of vegetable soup as soon as a chilly day comes along. Mmmm!
Speedy Lenten Latkes
While many latke recipes call for grated potatoes, I like to start with a base of peel-on mashed potatoes. There’s more fiber, a hint of color and no food processor or grater to clean.
Cut about 2 pounds red-skinned potatoes into chunks (removing any bad spots) and place in a large sauce pan. Cover with water, bring to boil and simmer until potatoes are soft.
Drain water. Mash potatoes with 1/2 cup mayonnaise (vegan or non vegan), 2 eggs (substitute with a bit more mayo if you are vegan), 1 yellow onion (finely diced), 1 1/2 teaspoons salt, 1 teaspoon pepper and 1 cup of bread crumbs (use crushed rice-square cereal if you’re gluten free).
Form into latke patties about the size of a deck of cards as you go. For the best browning results, pre-heat a cast-iron skillet, add about 1/4 inch oil (coconut if you’re ketoing; canola is also fine). Fry the patties on medium-low heat for about 4 minutes or until their bottoms are golden brown. Flip and fry the other side.
Line a holding plate with paper towels to absorb oil. Add more paper towels between layers of latkes. Add more oil to your cooking pan as needed.
Eat while piping hot, but save any leftovers in the freezer to thicken a future batch of soup.
SNACKS/LUNCHES
Boiled Eggs/Deviled Eggs
Fill a large kettle with enough cold water to cover by one inch a dozen eggs lying on the kettle’s bottom. Gently add the eggs.
Cover the kettle and heat the lot on the stove until a gentle boil is reached. Turn off heat, leave cover on and let eggs continue to cook for 13 minutes. (A shorter cooking time yields a medium- or soft-boiled egg — with a soft yolk. This can be great for immediate eating, but go for hard boiled if you’re making a stash or deviled eggs.)
Using the lid to hold back the eggs, drain out hot water and replace with cold water. After a minute or two, replace the water again. (This prevents overcooking, which causes a gray ring from forming around the yolk.)
When eggs are cool to the touch, store (shells intact) in an airtight container (to prevent odor transfer) in the refrigerator up to 3-4 days. Use as needed.
For deviled eggs, peel and halve each egg lengthwise and scoop out the yolk with a spoon. Arrange the empty halves on a plate. Set aside.
Put the yolks in a small bowl. Add a similar volume of mayonnaise, a bit of salt and pepper and a splash of hot sauce to taste. Minced celery, relish or minced pickled/roasted peppers are also good additions.
Mash the yolk mixture together until smooth and place into a pastry bag or a quart-size plastic bag with one corner snipped off. Pipe/squeeze the mix into the empty white halves. Top with a sprinkling of paprika. Serve immediately or refrigerate in an airtight container.
Moo-free Maple/Cashew Popcorn
(Air-popped corn is low calorie, but tasteless. If you want something good, go for kettle corn as directed below.)
Place a large, heavy-bottomed kettle on a stove burner. Place 1-2 Tablespoons high-heat oil (such as canola or coconut) in the bottom and swirl to coat. Add 1/3 cup popcorn kernels.
Turn the heat to medium high. Put on the lid and put a glove-style pot holder on each hand. When the first kernels start to pop, lift the kettle off the burner and vigorously shake it from side to side (not up and down) to redistribute the kernels that aren’t yet popped. Make sure to hold the lid down while you are shaking. Put the kettle back on the burner. Repeat the shaking maneuver every 30 to 60 seconds until the popping slows down to almost nothing.
Turn off the heat. When the popping entirely stops, open the lid away from your face. (The steam will be hot.)
Leave the popcorn in the uncovered kettle, add 1 cup roasted/unsalted cashews (or unsalted nut of your choice — if using salted nuts, leave salt out of the glaze). Set aside.
In a medium sauce pan (sized big to avoid boil over), heat 1/4 cup maple syrup to a boil. (The real thing is way better, but I won’t tell if you use the fake stuff.) Boil for about a minute.
Turn off the heat and add 1 teaspoon nut butter (your choice) and 1/8 to 1/4 teaspoon salt to the syrup. Stir thoroughly. Pour syrup mixture over popcorn and toss with a large spoon until evenly coated.
Dry in kettle or on a cookie sheet (or in your tummy…). Serves 4-6 people.
Leftovers (as if) can be stored several days in an airtight container.
Peppery Pinwheels
Allow 2-3 Tablespoons of cream cheese (dairy or vegan) and one tortilla (the rectangular ones are the easiest to use, the colorful ones are the prettiest) to come to room temperature. Finely dice two mini sweet peppers of different colors. (At Christmastime, use full-size red and green peppers and up the amount of cheese and tortillas to make a whole tray of pinwheels for a party!)
Spread the cream cheese evenly over the tortilla, as far out to the edges as you can manage. Sprinkle the pepper bits all over the cheese. Roll the lot into a tube, secure it with a tie or wrap with waxed paper, and chill in the refrigerator for 15 minutes. When chilled, cut the tube into 1/2 inch slices. Store in an airtight container in the refrigerator until serving the slices flat to show off their pin-wheeliness.
So cute. So easy. And, the variations are endless. If you don’t have peppers handy, throw on some raisins, diced dates, craisins, diced dried apricots etc. Or, if you don’t have cream cheese in the house, substitute hummus dotted with raisins and grated carrots. Or use nut butter and something fruity.
As long as the tube is properly chilled before slicing, the pinwheels should stick together nicely on their own. If you are having a party, or you are a bento ninja, skewer with pretty wooden or reusable toothpicks. Enjoy!
Homemade Kettle Corn
Place a large, heavy-bottomed kettle on a stove burner. Place 1-2 Tablespoons high-heat oil (such as canola or coconut) in the bottom and swirl to coat. Add 1 Tablespoon popcorn kernels per person.
Turn the heat to medium high. Put on the lid and put a glove-style pot holder on each hand. When the first kernels start to pop, lift the kettle off the burner and vigorously shake it from side to side (not up and down) to redistribute the kernels that aren’t yet popped. Make sure to hold the lid down while you are shaking. Put the kettle back on the burner. Repeat the shaking maneuver every 30 to 60 seconds until the popping slows down to almost nothing.
Turn off the heat. When the popping entirely stops, open the lid away from your face. (The steam will be hot.)
Distribute popcorn into individual bowls and let people top as desired. The oil from the kettle provides some flavor. I like to add nutritional yeast flakes and a tiny bit of salt to my bowl. A cinnamon-sugar sprinkle is another good possibility, as is (for non-vegans) a dusting of Parmesan cheese.
SOUPS
Chicken Pot “Pie” in a Hurry
Put two quarts of cool water into a large soup kettle. Add 1 1/2 pounds whole chicken breasts(skinless; frozen or fresh). Cover, bring to a boil, reduce heat and simmer for an hour. Walk away from the stove and do whatever else you have to do until 15 minutes of this hour are left.
As the hour approaches, peel and slice 3-4 carrots. Set aside. On the hour, use a slotted spoon to transfer chicken to a plate. Using kitchen scissors, snip into bite-sized pieces and return to the soup kettle. Add carrots, 1 cup frozen peas, 1 cup frozen corn and 12 oz. of macaroni. Simmer another 20 minutes or until carrots are fork tender.
Taste a spoonful of cooled broth. Add 1/2 teaspoon salt, 1/2 teaspoon pepper, 1/2 teaspoon dried thyme and 1/2 teaspoon powdered onion. Taste once more. Adjust seasonings if needed. Finish with a splash of nut milk for a bit of creaminess and serve while piping hot.
Curried Cauli-Potato Soup
In a large kettle, combine 2 cups of finely chopped onions, 1 minced jalapeño pepper, 1 teaspoon of ground ginger, 1/2 teaspoon salt and 2 tablespoons olive oil. Cover and cook on low heat for about 10 minutes, or until onions are translucent.
Add 2 teaspoons turmeric, 2 teaspoons ground cumin and 1 teaspoon cinnamon and cook a minute or two, stirring constantly to prevent burning. Add 2-3 cups of chopped (peel-on) red potatoes, 1 lb. frozen cauliflower florets, 4 cups veggie stock, 1 teaspoon of salt. Cover and bring to boil.
When the soup is boiling, a 1/4 cup uncooked-but-rinsed jasmine or basmati rice. Cover again and cook until vegetables are tender — about 15 minutes.
Mash the soup just enough to make the liquid cloudy. Add 1 Tablespoon (not more!) of fresh lemon juice, a teaspoon of sugar, 1 tablespoon dried cilantro, 1/2 teaspoon salt and 1/2 teaspoon black pepper.
Add a salad of greens or fruit (or a combo) and come crusty bread for dipping and you’ll be feeling better in no time. Serves 6. If reheating leftovers, thin with a bit of water.
Frozen Asset Soup
This technique works for either stock or a hearty vegetable soup.
For stock, freeze clean veggie trimmings such as the stem ends of zucchini, carrot peels, potato peels and so on in a gallon freezer bag. When it is full, throw the lot in a stock pot, cover it with water and simmer for about an hour. Strain out the solids, add some salt and pepper and, voila, free veggie stock that can be refrozen in measured amounts.
For a full-on soup, freeze those odd little bits of sauce, cooked veggies or legumes that are left over after a meal. When the bag is full, simply add some veggie stock, some jarred pasta sauce and season to taste. “Free” soup.
One caution for either the stock or the soup: Avoid fruit and any vegetables that aren’t normally cooked; cruciferous veggies such as broccoli, cauliflower and Brussels spouts; and anything that contains pasta or grain. Such items will either do weird things to the end result’s texture or flavor.
Savory-Swirl Pumpkin Soup
For the swirl: Combine 1 teaspoon finely minced garlic, 2 Tablespoons olive oil, 1 teaspoon caraway seeds, 1/4 teaspoon hot sauce, the juice of one medium lemon, 2 Tablespoons dried or fresh cilantro and 1/8 teaspoon salt. Set aside to allow the flavors to blend.
In a soup pot, sauté 2 cups of chopped onions in 2 tablespoons olive oil until translucent. Add 1 cup chopped carrots and 1 1/2 teaspoons salt and cook another five minutes. Add 3 cups veggie stock, one peeled/chopped apple, 1/2 cup tomato juice or V-8 (the latter is better if you have it), 1 teaspoon ground cumin, 1/2 teaspoon ground nutmeg, 1/2 teaspoon ground cinnamon and 1/2 teaspoon paprika. Cover, bring to a boil and then reduce to a simmer. Cook, still covered, until carrots are fork tender.
Turn off heat and add 1 15-ounce can prepared pumpkin (not the kind with pie seasoning; you can use butternut squash purée if you live in a part of the world where canned pumpkin is not a thing). Use a blender or a blender wand (much easier) to purée the soup until smooth.
Ladle the soup into bowls (makes about 6-7 cups). Top each bowl with a teaspoon or so of the swirl. (Stir the swirl with a fork first.) If you’re artsy, use a fork to go for an actual spiral effect. Serve with hearty bread, a light salad and a smile.
Spicy Butternut Squash Soup
Peel, seed and coarsely chop a large butternut squash (the ones with larger, thicker necks have the most edible flesh). Put the squash (it’s OK to use frozen if you’re pressed for time or not handy with a chef’s knife) in a large soup kettle. Add four to six cups of vegetable or chicken stock. Cover with a lid and cook on high until boiling. Reduce heat and simmer until squash is fork tender.
While the squash is cooking, whip up one recipe of my Speedy Summer Corn. This recipe can be reached through my home page under the recipe button, or just saute 1 package frozen corn until some kernels are lightly browned and season with cumin and chili powder. Set aside.
Using an immersion blender, puree the squash and stock. Add one 16-ounce jar of good-quality salsa and stir. Add a bit of water if the soup is too thick. Taste. Add salt and pepper if desired. Ladle into bowls and top each serving with 1/2 cup of Speedy Summer Corn. Served with crusty bread and salad, this makes a satisfying meal on a cold weekend.
Split-pea Soup
After sorting to check for things like pebbles and stems, rinse and drain 1 package (usually about 1 lb.) of green split peas. Put peas, 4 cups veggie stock and 2 cups water in a large stock pot or crock pot.
Add 1 peeled carrot and 1 rib of celery, thinly sliced; two cloves garlic, minced; 1 bay leaf; and 1 teaspoon rosemary. On the stove, bring to a boil, then simmer until peas are mushy soft. (At least a couple of hours will be needed.) In a crockpot, cook on high for 4-5 hours or low for 6-8 hours.
Remove bay leaf. Sample the soup, then add salt and pepper to taste. Now, stir and check fluidity. Add a bit of water if needed to reach the consistency that you like. Before serving, briefly insert a wand blender and partially puree soup. Add a squeeze of fresh lemon juice just before ladling into bowls. Stir in between bowls as peas will settle. This makes 4-6 servings.
VEGGIES
African Sweet Potatoes
In a large bowl, mash together 5 cups cooked sweet potato or yam chunks*, 1 cup unsweetened coconut, 1/2 cup flour (wheat or gluten-free), 1/2 cup brown sugar, 1/4 cup milk (dairy or nut), 1/2 teaspoon salt, 1 teaspoon vanilla and 1/3 cup melted butter or vegan substitute. Spread in a buttered baking dish.
Top the mix with another 1/2 cup brown sugar, 1/3 cup butter or vegan substitute cut into small chunks and 1 cup chopped pecans or walnuts.
Bake at 350 degrees F for 45 minutes or until golden brown. If baking ahead, cool to room temperature, tightly cover and refrigerate until ready to rewarm.
* While boiling real yams or sweet potatoes is better, it is OK to use canned chunks if you need speed. Just thoroughly rinse and drain the sweet potatoes before mashing.
Binge-worthy Cauliflower
Stir fry 1 12-ounce package frozen cauliflower florets in 2 Tablespoons of olive oil. When florets are fork tender, add between 1/2 to 1 teaspoon of hot pepper flakes, 1 teaspoon ground cumin and 1 teaspoon of caraway seeds. Stir to coat.
Serve warm over brown basmati rice or toss with whole-wheat spaghetti. Unsalted cashews make a nice topping. This recipe doubles well, but you might want to taste before doubling the spices and adjust according to your own preferences.
Corn-off-the-cob Cakes
In a medium bowl, mix 3/4 cups yellow corn meal, 1/2 cup flour (wheat or gluten free), 2 teaspoons baking powder and 1 teaspoon each of dried tarragon, dried dill and dried parsley. (Up the herbs to 1 Tablespoon each if you are using fresh.)
Add 1 egg, 1/2 cup of mayonnaise and 1/2 cup of milk (dairy or dairy free)and mix until just blended. Fold in about 2 cups fresh sweet corn. (If you are using frozen corn — which is better if fresh corn is out of season or not available — thaw or lightly saute the kernels first or they will clump.) The mixture should be thick, but not dry. If it is crumbly, add a second egg and/or more mayonnaise.
Prepare one or more iron skillets by heating them and pouring in about 1/4 inch oil. Drop balls of the batter (about the size of a ping-pong ball) onto each skillet. (A nine-inch skillet can cook three cakes at a time.) Fry on one side until the batter is set enough to flip the cake and the bottom is golden brown. Fry on the other side until the other side is browned, as well.
In the warmth of summer, just stack the cakes on a platter lined with oil-absorbing paper towels and bring them to the table where you have some sort of colorful, relish-like topping ready in a bowl. (In the winter, keep them warm in a super-low oven or cover with a towel until serving.)
I chose to top our cakes with halved grape tomatoes tossed with vinegar and oil. The topped cakes are delicious with a green salad or a fruit salad. In cold weather, they would be wonderful with soup.
Eat-Your-Veggies Stir Fry
Choose what vegetables you are using and wash, peel, chop enough for two cups (raw) per serving as they will cook down. Chop some onions and garlic, too, regardless of what veggies you pick.
(A note: If you are cooking for one or you could use leftovers in tomorrow’s lunch, cook that way. Make more than you need for this meal. Hard vegetables like carrots, celery and cauliflower hold up well in an airtight container in the refrigerator for a couple of days. Softer veggies, like zucchini, will last at least a day. Vary the carb accompaniment — rice, pasta, quinoa etc. — and the sauce (Asian, Italian etc. ) and you have the base of at least a couple meals ready to go.)
Heat your wok (get one!) on a medium-high burner. Add 1-2 Tablespoons olive oil. Add veggies and stir to distribute the oil. Stir fry, not being overly zealous with your stirring. Letting the veggies rest a minute or so between stirs yields a tasty char that you won’t get if you’re stirring in time to the latest TobyMac tune. Just watch the heat. You want char, not charcoal.
Before or after you start stir frying — depending on the timing needed for whatever you are topping with the veggies — make a healthy carb. Whole-grain pasta, brown rice, jasmine rice, quinoa, skin-on mashed potatoes are all good as long as you practice portion control.
Back to the veggies, when they are fork tender, turn off the heat and separate them into two parts. Season whatever you are using for this meal however you like. Let the rest cool to room temperature, put it in an air-tight container in the refrigerator and season only when you are going to use it to allow for variety. If you can’t use it up fast enough, pop the container into the freezer and use it in veggie soup when a cool day rolls around.
Serve tonight’s veggies atop your carb of choice and top with fresh herbs or something crunchy, like cashews. No one will have to remind you to eat these vegetables!
Money-in-the-bank Potatoes
Gather about 10 tennis-ball sized potatoes (or the volume equivalent of another size) that have thin, relatively unblemished skins. (I prefer red-skinned.) Leaving the peels on (for better nutrition), cut potatoes into large chunks, removing any damaged areas. Boil in lightly salted water until the potatoes can be easily pierced with a fork.
Here is where my technique diverges. To keep things vegan or dairy-free, add about one cup of a mayonnaise-like product, 1 teaspoon salt, 1/2 teaspoon pepper and thoroughly mash. You want enough mayo-like stuff to eliminate a dry look, but not so much that you have goo.
This is your base. What can you do with it? Eat it as is as a side dish. Fill a pie plate with the potatoes, top it like a pizza and bake. Add all the ingredients of potato salad (I like dill, celery, corn, mustard and vinegar) and serve alongside picnic foods. Mix in breading (check out my recipe for Thrifty Gluten-Free Breading under the main menu bar), chopped onions and an egg or two (or the vegan equivalent) and fry in patties for instant latkes. Serve this with apple sauce for a quick, tasty meal.
I recently discovered a new twist when I had a leftover bonanza. Put the potato base in a kettle. Add my recipes for Speedy Summer Corn, Al-faux-do Sauce and a container of veggie broth and you have a ridiculously fast chowder. This soup plus a salad and a crusty loaf of bread makes it look like you really tried.
The potato base can be stored about 48 hours in the refrigerator, meaning you can easily use it as a side one day and as a very different meal the next. It can also be frozen and thawed quickly in the microwave, although we rarely can keep it around long enough to require such efforts.
Refrigerator Pickled Peppers
This recipe makes a small batch that can be safely canned without hot-water or pressure-canner processing.
Wash and coarsely chop 1 jalapeno pepper, 1 hot banana pepper and a pound or so of colorful mild peppers. Evenly distribute the pepper pieces over four pint-size canning jars or well cleaned spaghetti jars. (To reduce the heat of the peppers, carefully remove seeds and membranes from the jalapeno and banana peppers if desired. Pepper chemicals will be on your skin. Make sure to wash your hands well before touching your eyes.)
Add 1-2 garlic cloves to each jar. If there is any extra space, fill the jars to about 1/2 inch from the rim with washed, peeled and chopped carrot pieces. (Tip: If you’re not into peppers, do all carrots. Or pickle small cucumbers, pieces of cauliflower etc.) Set jars aside.
In a medium sauce pan, bring four cups of apple cider vinegar, 1/2 cup white sugar, 1 Tablespoon peppercorns (or 1 teaspoon freshly ground black pepper) and 1 Tablespoon salt to a boil. (This is a bare-bones spice recipe. Experiment with cloves, turmeric, dill etc. if you like.) Whisk until completely mixed and pour the hot liquid right into the jars. There should be enough to cover the vegetable pieces.
Top with lids, cool to room temperature on the counter and store in the refrigerator. Pickles will taste their best after 1-2 weeks of refrigeration.
Savory Potato Coins
Preheat oven to 400 degrees F.
Wash about 10 mid-size red potatoes or about 7 golden potatoes. Cut off any flaws, but otherwise leave peels intact. Cut the smallest sliver off each end of the potato to expose the flesh, then slice the potatoes crosswise into 1/4 inch coins.
Put the sliced potatoes in a large mixing bowl. Add 2 Tablespoons mustard, 1 Tablespoon olive oil, 1 teaspoon of salt and a Tablespoon of your favorite dried herbs. (I like a mix of Italian herbs like rosemary, basil and oregano with this.) Using a large spoon, toss to coat.
Spread the slices on one or two cookie sheets that have been lightly oiled and bake for about 25-30 minutes. Potatoes are done when they are fork tender and golden brown on top. (If you’re feeling extra, flip them midway through the bake so they are browned on both sides. The taste is about the same either way.)
Store leftovers in a tightly sealed container in the refrigerator. They make speedy “hash browns” if reheated with sauteed onions. Add a scrambled egg if you’re not vegan and you’ve got a whole meal. Or, cube the coins and use them in soup.
Note: For variety, use ranch dressing instead of the mustard and oil.
Speedy Summer Corn
Stir fry one bag of frozen sweet corn kernels in olive oil until just tender. Remove from heat and toss with 1/2 teaspoon chili powder, 1/2 teaspoon ground cumin and salt and pepper to taste. For extra zip, add a squirt of freshly-squeezed lemon or lime juice.
This works as a side dish, mixed into a salmon/pasta salad or as a taco topping. It’s also great on top of quinoa as part of a power bowl. Round out the latter with some roasted peppers and tomatoes and some sort of a legume and you have an entire summer meal.
+++
